Sunday, October 7, 2012

Fixing up the Stairs

When we first moved into the farmhouse, the stairs were in pretty bad shape. And by bad shape, I mean they were really ugly. There clearly had been a runner on the stairs that was pulled up, and the remaining white paint left something to be desired.


So, painting the stairs was actually the first thing on our to-do list. We got started pretty much the day we closed on the house - we figured it would be better to paint the stairs before tons of critters (namely our 4 cats and 1 dog) were in the place. We started painting despite the fact that we didn't even have power in the house... fortunately it was the beginning of summer. Still not too hot but very bright!

We spent a ton of time sanding down the stairs a bit and then cleaning them up. We discussed filling in the divets and dents and nail holes from the historic runner with wood putty to make the stairs perfect and flat before painting them, but then we said SCREW IT!  We didn't buy a 101 year old house so it would look brand new! These dents have charm!  (this could also be interpreted as: we were just too lazy).

We meticulously taped all of the stairs. Then I just had to slather the brown paint on.  Again, we used the Behr Ultra Paint + Primer in 1.  No particular reason.  I just like it.


After painting the stairs, we took some time to get the bannister and the top rail, to complete the look.  We also painted the stair faces and crown molding white, to make them look clean and pop.

the final product
from the top of the stairs
The stairs actually got a little knicked and banged up when we moved in and hiked furniture up this squeaky set of old (and surprisingly narrow) stairs.  In that respect, it would have been better to wait until post furniture move-in to paint, but we plan on getting a carpet runner, so we weren't too worried about it!

Saturday, August 18, 2012

Living Room Updates!

The farmhouse actually has a pretty good floor plan for such an old house.  The living room is pretty open to the kitchen, and most of the house gets a lot of natural light.  

Unfortunately, the living room barely gets any.  :/  There's only 1 small window in the front of the living room, and it gets minimal light because of the roof over the front patio.  So, it's consistently really hard to take pictures of the living room.  :( There was a LOT of sun the day we closed, so I did manage to get these pictures of the living room before we moved in.


Painting the living room was one of the first things on my agenda after getting fairly settled in, because I had a box filled with picture frames that I wanted to get on the wall.  

For the living room, we used the same paint as the kitchen - the Behr Premium Plus Ultra Paint and Primer in one, and we chose a light peachy/rosy color scheme for the living room.  I initially just painted the back wall (because that's where I was putting the pictures) and we decided to make it an accent wall with a slightly darker color.  We tried to pick a color that wasn't too dark, however, because we definitely didn't want the living room to end up dark as a cave.

It definitely would have been easier to paint before moving in...

I actually took the color and wrapped it around into the kitchen as well.  I ended up really liking the mauve-ish pink color.  It felt very warm and homey.  :)


After getting the wall painted, I could finally put all the pictures back up again. That was actually a lot more tedious than painting.  I had spent hours and hours (and hundreds of dollars on frames) developing a perfect 11ft x 3ft picture collage in the condo -->


only to realize that I did not have a single 11ft long wall in the farmhouse... 

OMG. *sigh*

So I ended up having to formulate a new design to fit the living room wall in the farmhouse.  I had to buy 1 more frame to make it work - and that poor frame is still empty.  But someday, it'll be the perfect spot for a wedding picture!


Clint is busy playing Diablo III on a Saturday morning.
He just loves playing Diablo III in front of our beautiful picture collage! 

Now that I'm not in a super modern lofty condo, I might end up switching back to color pictures, but for now I'm happy with it!

Thursday, August 16, 2012

Storage!

One of the greatest things about our new house is the mudroom, a big room filled with laundry vessels and ample room for storage. It was hard to tell *what* exactly the mudroom was when we were looking at the advertisement for this house, as there was a bed right next to the washer and dryer... but once it was cleared out, the mudroom became wonderfully unambiguous.  :)

Apparently I only took 1 picture of the mudroom before moving in, and its only one side of the L-shaped room.


Aside from the pergo floors, the room is actually quite pleasant. There's a side door to the backyard (convenient for the doggy door for that biz biz), and there's a lot of light thanks to 3 windows and a windowed door.  The room is also nicely fitted with Bosch washer + dryer.  SUPER QUIET.  amazing.

As soon as I saw the mudroom, I knew it would make for some excellent extra pantry space!  SALE SHOPPING + EXTREME COUPONING here I come!!!  After looking around all over for suitable modular storage systems, we finally decided on a set from Ikea. 


(I'll be honest, I told myself once I "grew up" and "bought a house" I would stop buying stuff from Ikea.  Well, I lied to myself.  I bought a modular entertainment center/storage system for the condo, and now we have one for the farmhouse.  What can I say, Ikea rocks modular storage!)


This is the only "in progress" picture.  Despite a power outage in the middle of assembly, set up was going smoothly until we had to try to figure out how to attach the drawer fronts.  Normally, this would be a simple task.  However, (I could be wrong), as far as I could tell, Ikea didn't sell drawer fronts that were full size - only short drawer fronts, as seen below. I had these short drawers in the entertainment center in my old condo - they were convenient because you could just shove a shelf in there, have a closed drawer and then have an open front for accessories such as cable boxes/PS3s/wii's/original nintendos/routers/etc.  

short drawers convenient in an entertainment, as seen in my bmore condo.

However, the short drawers were not suitable for a closed, we-want-it-to-look-pretty storage system, so we bought the regular sized doors (like in the above TV cabinets on the entertainment center), and had to find a way to attach them to the drawers.  It was our best attempt at ikeahacking.  (Really, we just used 4 L=shaped brackets per drawer).  We bought the handle hardware at Lowes - this handle design was just so much cuter than the ones available at Ikea.


In the end, I think it turned out really well.  I am pleased with the way the storage looks and frames the window.  Unfortunately the room was a bit small to get a full picture of the storage system.


More importantly, however, the storage system has become an excellent new kitty condo with large windows for their entertainment.  


I may or may not have doused the top of the entertainment center in
catnip spray to get all of the cats up there at once...

All in all, storage system mission = SUCCESS!

Oh yeah - to further improve our storage capabilities, we also bought a huge freezer.  So far, it is really quiet and keeps everything really cold!  I can't wait to stock up on meats and make a bunch of frozen meals (and frozen crock pot meals) for us.

I also don't mind the giant ice cream we have sitting in there. I think its like 5 gallons of orange/vanilla swirl.  :)  Woot!


Monday, July 30, 2012

Strawberries Galore! And Blueberries to Boot!


In addition to the fig trees, we opted to get some standard fruit fare, starting with strawberry plants and blueberry bushes.

Strawberries!

We bought several varieties of strawberries to see what would grow the best and what tastes the best.  We came home with the following varieties: Ft. Laramie, Allstar & Honeoye.

Theoretically, these plants all have different fruit-bearing seasons too - such as Junebearing (crops in June) and everbearing (spring crop and late summer/fall crop)... For some reason, however, all 3 are producing fruit right now, even though it is neither June, spring or late summer. Perhaps it's because I'm a terrible gardener and I planted them all in the middle of July...  Haha!  

Speaking of bad gardening... I'm also a little concerned that the strawberry plants are not getting enough sun where they are, but we had limited locational options due to the soil issues mentioned earlier.  If the strawberries end up showing low fruitage or just really tiny fruits, I might end up transplanting them to a sunnier area (probably after we establish our garden).

We planted the strawberries near the side of the house.  They get great sun exposure until 1 or so, when the sun crosses over the house.  We had to rip out TONS of plants (including yummy mint) to make room for these strawberries, and tossed out a lot of the old mulch so we could put in better aerated soil for the strawberries.

Despite the late planting and the less-than-ideal sun conditions, we did harvest our VERY FIRST STRAWBERRY today! 

Okay, so I know the first year you're supposed to pluck the flowers and the runners to establish more solid root growth... but... like I said, terrible (impatient?) gardener.  Hopefully our incredibly warm summer will also be incredibly long and the roots will still grow sturdily.  Hopefully.

I should have taken a picture of our baby strawberry... but... well, it was very little (about the size of my pointer finger to the first knuckle).  And it seemed like a bug had started to eat it.  So I had to pluck it immediately and eat it!  There was no time to lose!

I took the first bite, and gave Clint the second bite.  It was SOOOOO YUMMY.  Rich with actual strawberry taste!  Yay!


Blueberries!

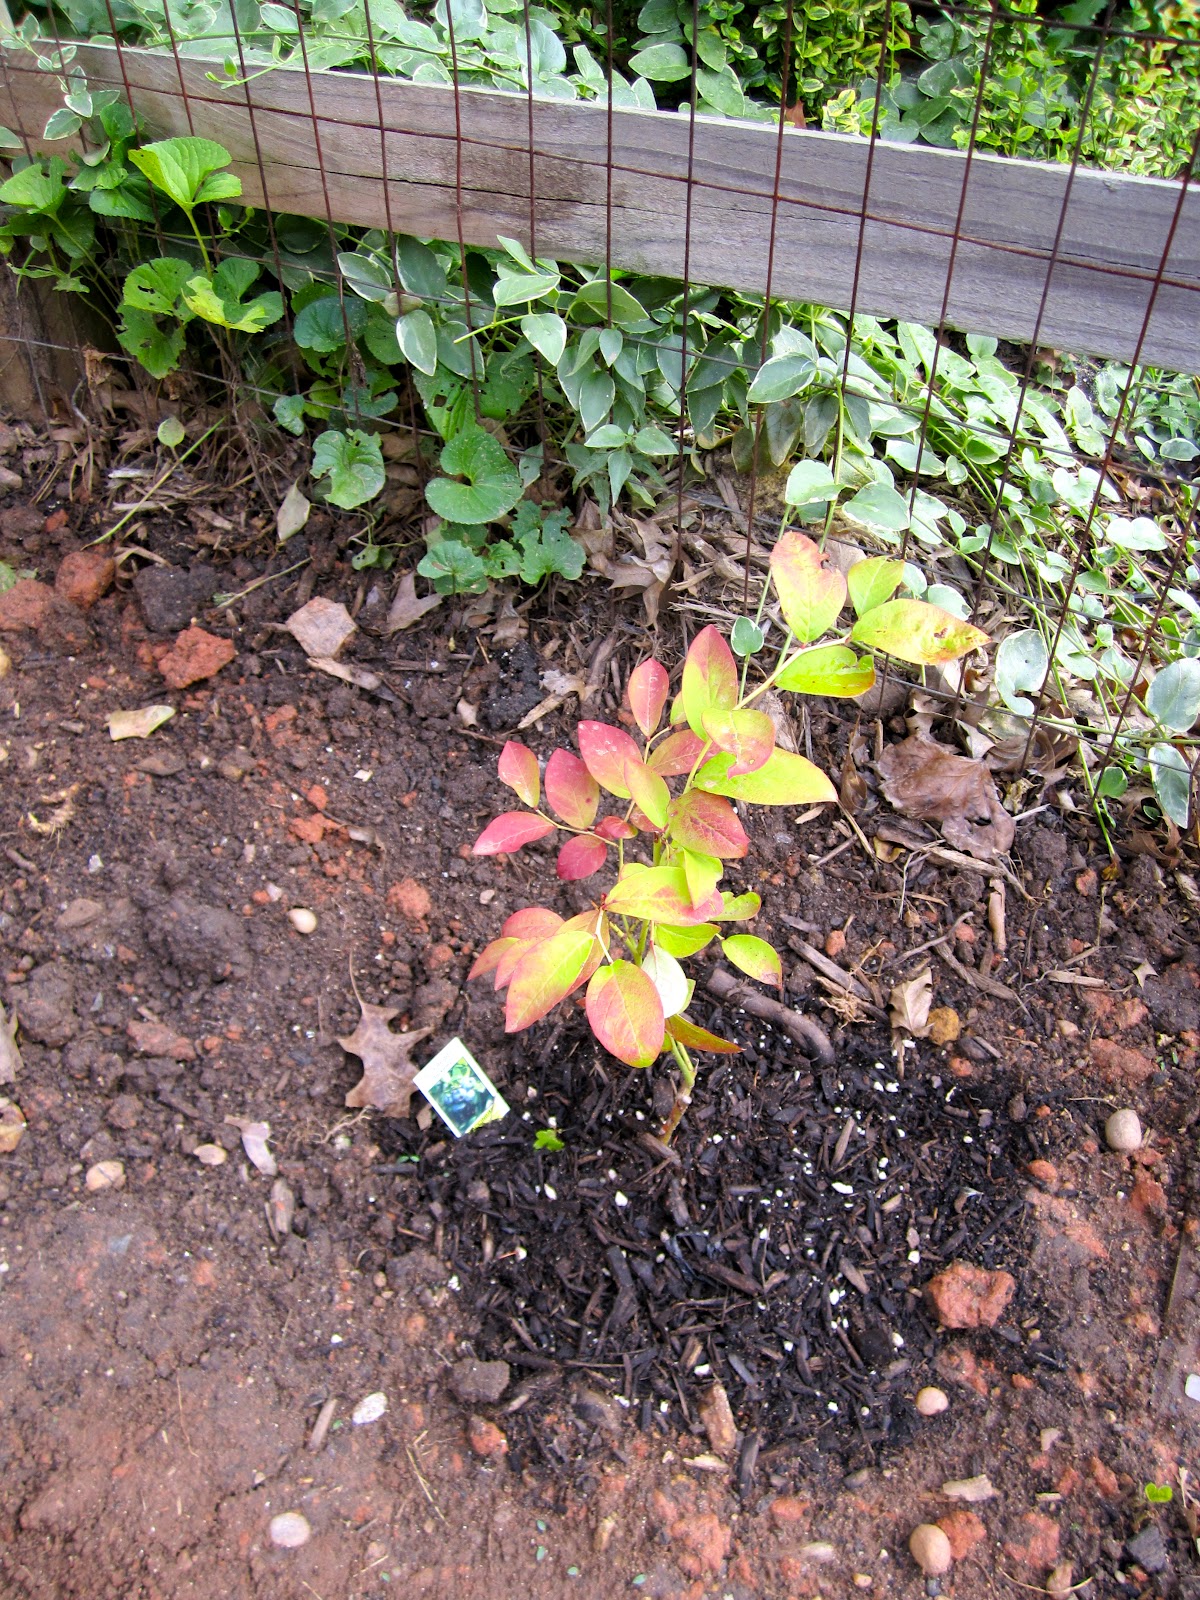
We opted for 3 blueberry bushes, also in 3 different varieties - Duke, Patriot and Berkeley.  The Duke is an early fruit bearing variety, the Patriot yields early-mid season and the Berkeley is a later bearing blueberry bush.  

We already harvested 1 amazing blueberry from the Duke tree (we bought it with a couple of baby blueberries on it), but we haven't really gotten fruit from the others.  Well, the Patriot tree DID have a blueberry... but I think a bird or something stole it before I could pick it, and I was very sad!

We opted to plant these bushes into the ground.  Being in the same general vicinity of the strawberries (they're on the other side of the red stairs), I am similarly concerned about the amount of sun they will get.  I can't remember exactly why we put the bushes here.  

Our 3 bushes.  I thought they all had to be 16-20 inches apart, and then I saw that the outlier had to be 4' away from the others, so we had to put him in the grass.  Where the soil was also terrible.  We'll see how that works out...
I think because the area to the left (that isn't covered in grass) was originally filled with vegetation, we thought the soil might be better there.  WRONG.  It was still awful, haha.  

It was also really hard to dig out.  SO MANY ROCKS!!!  This was made worse by the fact that we had to dig extra big holes to fill with better dirt. And by we, I mean Clint.  I just threw rocks from the dig sites into a sinkhole on the other side of the fence where there used to be a well.

Here's a close-up of the 3 plants.

This guy ERUPTED with massive new growth!  YEAH!


I hope they continue to grow despite their location.  We shall see how they fare.  They haven't died yet... that is at least promising.  :)

Lastly, I took some of the mint that was growing where the strawberries are and threw them into some pots.  Now I have a vigorous mint patch!  I'm thinking mojitos for the housewarming party...


I'm also thinking of throwing some in the yard to let it take over the grass.  The grass isn't THAT great anyways... and besides, I've read that it smells really good when you mow the lawn.  :)

Fig Trees!

Long before we ever bought the house, I began dreaming about our garden-to-be.  A luscious landscape, teeming with a wide array of succulent jewels, straight from Mother Earth's fertile womb. An abundance of nutritious organic fruits and vegetables for us to consume merrily while being simultaneously eco + health friendly...

Well, we haven't quite gotten there yet.  Okay, so we're not even close.  Maybe we haven't even tried...  To our dismay we have quickly discovered that the "fertile earth" here kind of sucks... It's filled with rock hard clay (not to mention rock hard rocks), there's very little drainage and we're going to have to tear up our grass/lawn to put a garden area in.  

We haven't figured out how we're going to work this yet.  There is a good solution.  We are still pondering it. Perhaps this is a project for spring 2013. 

We lost little time, however, buying a small collection of fruit plants to tide us over until the spring! To start - we bought 3 beautiful fig trees!  Figs are DELISH, and so expensive to buy fresh.  When I found out they grow well here in Maryland, there wasn't a question!

We went back and forth with the decision to keep the fig trees potted or plant them in the ground.  So far we've decided to go with potted, for a number of reasons:  
  • As previously mentioned - the dirt sucks. It doesn't drain well (which apparently is very important for fig happiness), but it is also REALLY hard to dig a hole in! 
  • We don't know where to put them.  It's tough to make such long term decisions and we just weren't ready to pull the trigger yet.
  • Figs are tropical trees and don't like the cold winter. Keeping fig trees alive through winter in Maryland can entail wrapping them in plastic/straw/mulch/leaves/other shenanigans.  Alternatively, you can move potted fig trees to a dark basement/shed/CELLAR (woot we have one!), to encourage the tree to go dormant for the winter, but not die in the cold/frost/nasty winter weather.
  • Keeping fig trees potted is a great way to constrain their growth and maintain a reasonable sized fig tree.

Woo!  Behold our lovely collection of fig trees!

This is our 'celeste' fig tree.  I love the huge willowy leaves.  As you can see, it does have a number of small baby figs.. but they don't appear to be growing... I hear celeste trees can be quite 'difficult'.  Right now with the pot, the tree is about my height, approximately 5'10"... (okay, more like 5'4")

This is our 'brown turkey'.  It has recently exploded with new leaf growth, I think its enjoying the new larger pot.  It has a ton of decent sized figs - I hope they ripen.  The figs on this tree are shaped sort of like a drop of water - rounded on the end, but oblong rather than circular.  This tree is MUCH shorter, and was clearly pruned to grow out rather than up.


Lastly, this is our 'texas everbearing' fig tree.  There seems to be some conflicting information - it may (or may not) be the same thing as a 'brown turkey'.  Why a nursery would sell the same thing under different names beats me.  But, from what I can tell - the figs are shaped QUITE differently.  I have noticed one large fig growing into a shape that is nearly a perfect circle.  They are quite rounded!

After much research, we planted them in a mixture of planting mix, compost manure, and perlite, to encourage soil drainage.  We topped the mix with mulch, to hold in some moisture.  

So far, the trees appear to be healthy. The celeste did suffer a spat of yellowing leaves not long after we brought her home, but I think it might have been a massive heat wave that sprung up at the time.  The other two have shown a ton of leaf growth recently, which is good I suppose, but annoying because I would prefer more figs!  Ah well. Hopefully the current figs all ripen up and we can feast upon them.  :)

We are still fig newbies - so please feel free to share your tips and expertise!


Thursday, July 19, 2012

Our Backyard

As promised, I ventured out to get pictures of the backyard and the back of the house.  The sun was beautiful this evening.

The back of the house:

The patio is really lovely.  It also has a nice view of the nearly the whole yard, and it's covered.  
It'll be an amazing brunch spot.

We also have an exciting storm cellar which will come in handy if I get into canning...

The yard was a little big to capture in one picture, so I took the first picture from outside our side door, and the rest from every corner of the backyard looking back toward the house.

You can see where the butternut tree was. 
The garden is likely to go here, it gets sun all day. 


 Because I love the big tree, I took a couple more pics of it.  Unfortunately it lost a number of branches in the big storm (that stole my butternut tree) but it's still beautiful.


Kitchen - Painted!

I wasn't a big fan of the yellow/creme color in the kitchen.  Not because I don't like yellow (I do), but it looked... 
dirty? ugly? dingy?  Something.

So painting was the obvious choice.  But we don't let Clint paint anymore, hehe. That was unfortunate though, because painting the kitchen was nothing short of a huge pain in the ass.  :)


But in the end, I think it was worth it.  

We used Behr Premium Plus Ultra (a Paint and Primer in One) in "Misty Morn UL220-9" = a light blue color:


Not only does it help the island 'match' the kitchen, but it really brings out the color pattern in the marble.
It also kind of matches the distressed blue paint on the shelf.

Puff was so tired after a long day of painting.

It seems like blue is probably not a common color for a kitchen, but I find it pretty soothing. I also really like the way the 
stainless steel and cabinets look with it.


On top of the pleasant change of color, the kitchen just FEELS so much cleaner.  The walls were dirty, and filled with cobwebs.
Now the kitchen just begs to be cooked in.  :)


Wednesday, July 18, 2012

Kitchen - post move in, pre-painting

The kitchen is big, and there was basically a whole wall empty of cabinetry. So we decided to fill it. With cute stuffs.


We found this wine rack/wine glass holder for cheap at HomeGoods. We don't drink a lot of wine, but the rustic metal and weathered wood embodied the 'industrial farmhouse' style we are going for
and we couldn't pass it up.
Throw in a few shower curtain hooks from BB&B, and voila!
A perfect 'industrial farmhouse' pot rack.


We also got this wooden shelf at HomeGoods. Ideally, this is the kind of thing we would make ourselves, but we're not there yet.
I'm obsessed with the idea of using wooden pallets to make things.
But for now, this will do.


I absolutely fell in love with this vintage lunch box at an estate sale (we went for an old trunk). Clint let me buy it. Actually, he bought it for me. <3

We also had to buy a microwave:


And awesomely, Clint got this cast iron skillet for free, as an anniversary gift with his company. Woot!


Nothing says country kitchen like a cast iron skillet!

Kitchen - pre move in

When we were looking at the pictures of the farmhouse online (before we bought it), it looked like the kitchen *might* be decent. The previous owner's pictures didn't do the kitchen justice - it's AMAZING.
(On the whole, the pictures didn't do the farmhouse justice. We were REALLY skeptical about even coming to look at the place.)

There is a 22,000 BTU 6-burner BlueStar range, in-wall Electrolux convection oven, and a cabinet-matching Bosch dishwasher.
Not to mention the awesome vent hood (perfect for when you're cooking Korean BBQ at home).

Unfortunately... there was a wildly UNMATCHING KITCHEN ISLAND. Apparently its the vogue thing to do these days?
On the whole though, can't complain.


The cabinetry is custom and from New Hampshire:


The stove is big and lovely:


This is where we've put the table:


Slightly awkwardly in front of the HVAC, a little storage closet and a really old phone, but what can you do?


The kitchen (well the whole house really) boasts the original (pine?) floors.
For the most part they really have a lot of charm.
For the most part...


At some point we will have to do something about the painted plywood mend job where the kitchen and the mudroom meet.