Showing posts with label painting. Show all posts

Friday, March 28, 2014

Bathroom Updates - Tile, Toilet, Mirror, Lights and Vanity!

     Thanks to a lovely mid-March snow-day induced 3-day weekend, the bathroom has come a long way since the March 1 update!  I mean, ITS PRACTICALLY ALMOST DONE!  It's not really done - there's no bathtub - but seriously, it's practically like a real bathroom now! And most importantly - it has a toilet!  Which means I don't have to run downstairs at 2, 3, 4 or 5 in the morning to pee. :) Yay! It was a lot of hard work, but totally worth it!

     After getting the wonderboard in and priming the walls for paint, it was time to start tiling the floor.  We weren't really looking forward to this because we chose admittedly difficult tile to work with - the tiles are a mosaic lantern pattern, and each tile is approx 2"x3".  We started by laying our initial straight line (which is hard when there isn't a straight line in your bathroom, period, haha), and then worked out from there.  Clint dedicatedly laid thinset, and I laid the tile behind him.  Though seemingly harmless, this was a little tiring at this stage of my pregnancy. And then I was (stupidly) laying tile while moving in a backwards direction and I managed to squarely step into the open vent hole on the bathroom floor.  My leg fell in and got scraped from my foot to my knee... and I tweaked my preggo back... and I'm lucky that there's a drop ceiling in the kitchen below the bathroom and I didn't poke my foot or the vent shaft through the kitchen ceiling!  :)  Other than that the process went pretty well.  


     The next step on the checklist was getting paint on those walls.  Unfortunately it's been tough to get a good picture that really captures the colors well between the never ending gray weather and the unnatural lighting - but I tried.  The lighter wall is called 'lavender heather' and the darker wall is dark purple with the faux brushed pearl effect.  I was afraid that the faux effect would be really difficult and time consuming, but it wasn't that bad!


     The following day we finally grouted the tile. And by we, I mean Clint and his brother Erin.  So I'm not really sure how tough the grouting process was, but I'm sure it was arduous.  It was also really messy since we decided to use a black grout to really accentuate the shape of the tile.  A bit after the initial grouting was done, Clint and I had to go up and buff the tiles and clean them up.  !!THAT WAS HELL!!  I think we waited a touch too long and the grout wasn't coming off very easily.  We had to hard-scrub every curvy grout-line, for hundreds of tiles.  We literally spent hours doing this.  So the moral of the story is - if you want to make your bathroom tiling experience way more time consuming and difficult than it can be, choose a curvy white mosaic tile and pair it with black grout.  :)  But at the end of the day, I love the way the tile looks, so again, totally worth it.

     After the paint and tile went in, we could actually begin to install some of the bathroom elements!  This was the part I was most excited for because I spent days and days looking at thousands of sinks, faucets, lights, dressers, tiles, mirrors, etc. trying to find elements that would match my vision for the bathroom.  (If you know me, you probably know that I'm very particular...)  So while I was excited, I was also nervous because it's hard to imagine what things will look like before they're actually installed.  Would I love it or would I hate it?!?!  Fortunately, I'm super excited and really pleased with the way things are shaping up so far! 

     With the help of Clint's Dad, the first elements to go in were the wall faucet and the light fixtures.  I absolutely love the antique look of the chrome elephant nose faucet - and the cross-bar handles are nearly a perfect match to the set on the tub.  I debated heavily about if we should use these Pottery Barn sconces because they weren't chrome (and pretty much all of our other fixtures are chrome), but I figured at least the bases are black, which should match our vanity top, and the shiny metallic mercury glass had a bit of a chrome feel to it as well.


     Next up was the toilet, mirror and vanity.  For as much as I tried to save money in this reno, there were certain elements I couldn't find "cheap" and didn't want to compromise on.  So, our toilet is a really pretty and slightly antique-y looking Kohler, and the mirror also came from Pottery Barn.  I actually had a hard time finding a large mirror that was wide enough, but narrow enough to fit between the vanity and our short ceiling.  

    I wasn't savvy enough to take any photos of the toilet with the seat down - but if you could see the tank, you'd see that it has a nice rectangular shape, and the front bows out - which matches the shape of the vanity and also draws in the curves of the tile.  (I'll make sure the seat is down for the completion post!)  So here's everything that we have currently installed!


     You may remember that the sink was a vessel sink, and I was contemplating dropping it into the vanity.  As you can see, we did just that.  We found that there wasn't a ton of space between the faucet and the sink, so the extra 1-2 inches gained made a big difference in the usability of the faucet.  :)  I also think that dropping the sink into the vanity gave it a more seamless look.  The size and shape of the sink ended up fitting the vanity perfectly!


     And here is one last picture of the space in 'natural' morning lighting.  I really love the way the light lavender draws out the brushed pearl element on the darker purple wall, and I'm really pleased with the way the purples coordinate with our 'black and white' elements.


     Hopefully the next bathroom post will actually be our completion post!  We still need to grout the tile in the over-tub toiletry bump-in, and then we need to frame that up to match the window/door trim and add the baseboard.  Then we just need to install the tub and the shower enclosure.  And then we'll actually be done!  I hope it turns out well.  Stay tuned!


Tuesday, February 4, 2014

DIY - Repurposing a Buffet or Dresser as a Bathroom Vanity: Part 2

At long last I've finally finished 
the buffet to bathroom vanity conversion!  
Well, the painting part at least... I actually finished several weeks ago,  but I've been tired and lazy and am just now
getting around to posting it.  :)  But what better time
to get back to blogging than when you're home sick
...on your birthday...
(birthday fail!)

I'm pretty sure the last time we saw this buffet
(Part 1) it looked like this:


My initial plan was to go with a strong black top,
to counter the white and separate the white base from the
large white sink.  I got the Rustoleum Satin Black oil-based
enamel paint.  Why?  Mostly because it was one of the only
non-spray black paints that wasn't giant at my
local hardware store.

I started by painting the dresser hardware with this shiny
black paint.  You can see it really shines!


Then I moved on to painting the dresser.
At this point winter was really starting to kick in so
I had to move the painting project inside (the outside temps
were too cold for the paint to dry effectively).

Moving the project indoors was a huge pain - not only because
we don't have a TON of space to work with (you can see
that I'm in this narrow area of the mudroom) - but because
there are cats indoors.  3 of them.
3 hopelessly curious cats.

3 curious cats that decided to jump all over the top of my buffet post-painting, regardless of the barriers I tried to put up.
You can see the paw prints below.
Those pesky kittens...


So I redid it.
And redid it again.
And redid it like, 17 times.
Sanding and painting, sanding and painting.


You can see in the shiny glare that the finish 
wasn't even - I'm not sure if it was user error or the oil based paint or what, but for THE LIFE of me, I could not
get that topcoat to look good.

It was streaky, uneven and terrible.  
Stuff got stuck in the topcoat from pretty much everything I used to apply the paint - and I tried a lot of different things!  
I used a foam roller, a regular roller, a hand bristle brush and a foam brush (all several times) and not once did I get something  with which I was even remotely satisfied.
Perhaps the problem was me, but I'll never 
buy that paint again!!

The longer drying time of the enamel also gave the buffet
ample opportunity to collect as much dust and cat hair
as possible.  TERRIBLE.

So after days (weeks?) of frustration, I finally decided
to screw the oil-based paint, and grabbed some of the 
the tub remodel and decided to use that.

BEST. DECISION. EVER.
(after marrying Clint, of course)

This made the project 100 million billion times easier.
We moved the buffet into the bathroom that's getting renovated
so I could spray paint to my heart's desire without
worrying about the walls or the carpet or furniture,
and we could close the door to keep the kitties out.
I'm not sure why we didn't think of that earlier.

I also went over the hardware with the hammered paint to make sure it would match, since the hammered black isn't as
strong or shiny as the enamel oil paint.

I finished the painting in just a matter of hours.
Then Clint and I spent a few days going over white areas with about 3 coats of polyacrylic (since it doesn't yellow the way polyurethane does), and also went over the black 
top with about 4-5 coats of polyurethane.

Here's some shots of the nearly finished product.
I apologize about the color - it was a little dark without
lights and not much better with the lights. :/

~tada~


And here's just a couple shots with the huge sink.
I love how well the curve of the sink fits the buffet's shape.

Part of me wants to inset the sink since its a bit high and there's a convenient lip that we could drop into the top, but we haven't made a final decision on that yet.

natural light
overhead lighting
I'm pretty happy with the way it turned out - I think
it'll look great in our black and white bathroom.
What do you think?


Thursday, November 21, 2013

DIY - Repurposing a Buffet or Dresser as a Bathroom Vanity: Part 1

We decided to repurpose an older buffet for use as a 
vanity in the bathroom remodel.  We chose this route for a few reasons - we like 'handmade' stuff, we wanted to save money,
and we thought the style would match the farmhouse well.

After weeks (months?) of craigslist browsing,
we finally found the perfect buffet.  Sadly it wasn't as 
cheap as a lot of craigslist finds (350, +25 for them to deliver), but I thought it was worth the investment. 

I really wanted a piece with center doors to maximize the storage we could get since we ripped a closet out of the bathroom to fit a double vanity.  Converting dressers with drawers in the middle requires cutting through several drawers to accommodate the sink drain piping and that kills a lot of your potential storage.

This is the buffet we chose:


I really loved the buffet feet (which remind me of the
clawfoot tub feet) and the woodwork along the base.  Because of the bowed front of the buffet, we've opted to use a single extra large (27" wide) oval sink, which mirrors the curve well.  

Originally it would have been nice to have his and her 
sinks - but it just wasn't right for this buffet.  And let's 
be honest, I doubt anyone had double sinks in 1911, right?  
At the end of the day, a single extra large sink is more 
era-appropriate and farmhouse-appropriate. :) 

 Though I'm not sure exactly what era this buffet is from 
(I highly doubt it's from the early 1900's), I am confident that it will match our bathroom perfectly!


* * * * *
The Refinishing Work


We knew we wanted to paint the buffet and stick
with our black and white theme, but we weren't sure how

much black and how much white to do.  After looking at several (dozens!) of b&w painted dressers on pinterest, Clint decided

that he preferred the 'less is more' look.

We decided to paint the entire buffet white except for the top and the hardware.  We thought it might be weird to have a white sink on top of a white vanity (and the whites might not match perfectly),  so a black top seemed like the perfect solution.

The first step in prepping the buffet was sanding
it and repairing the wood where needed.  We sanded with 100
grit sandpaper.  We probably *should* have gone over it again with finer grit sandpaper to make sure it  was really smooth... but we're lazy... and uh, this would make the buffet
look more 'antiqued' or 'rustic'... maybe? :) 


There were some chips in the top that needed filling,
and one part of the woodwork on the base needed repair.
We used Elmer's Carpenter Wood Filler.


After the filler dried, we sanded it flat and began

priming.  For the priming we used
Zinnser Cover Stain Oil-based Primer Spray.


After letting the primer fully dry, we applied
the actual white paint to the dresser.  For the exterior
We did several light coats. I think we used about 4 cans
for full coverage of the dresser and drawers.


After the white dried, I began painting
the buffet top - but I haven't finished yet.
I've been having some difficulties with the black
paint we chose for the top, and its been
nothing short of a huge pain! :(

Once I get that last coat finished, I'll seal the whole
piece using polyurethane on the top, and polyacrylic on the
body of buffet.  I've read that polyurethane is a better seal
against water (which is important for the top where the
sink will be), but yellows over time - which is why
we'll seal the white areas with polyacrylic
which isn't supposed to yellow.

I can't wait till it's finished - and to post an update
of the completed buffet vanity!
Stay tuned :)


Check out the final product in Part 2 here!

Sunday, November 17, 2013

Making a Nursery - Demo, Reno & Painting

With a little one on the way (eta 5.11.14!),
we decided to turn our smallest bedroom into a nursery.
Previously we had used it as a room for the kitties,
but sadly they got displaced to the mudroom, hehe.

The room is pretty small - about 12 x 7. This included
a long closet that spanned the entirety of the back wall. A
closet that was not particularly useful as storage and really
diminished the amount of usable space in the room.


Before we started painting any potential baby colors 
(wee!), I really wanted to nix the useless closet. Sure, 
without a closet it's not *technically* a bedroom,
but it's a lot more usable. And if push comes to shove 
we can always build in a small closet later on down 
the road for resale or something.

So after consulting Clint's brother - who
confirmed that ripping the closet out would be a 
piece of cake - Clint and I went to town on the demolition.
Erin said it would take like 20 minutes.  Ha. Ha.
Maybe it would have taken Erin 20 minutes,
but it took us 2 or 3 hours, hehe.

What Erin didn't mention was how hard fixing the room
would be after we ripped the closet out... The house is old 
and settled. When we replaced the drywall, the walls/seams were NOT flat and the ceiling was NOT level.  After copious amounts of mudding - probably about 5 rounds worth (and about 5 rounds less than was really needed) - we called it good enough.  :)

Post mudding, pre-painting.

Finally after we finished the mudding (thanks to a 
lot of help from Erin!!), we painted the room.  Yay!
And when we painted the walls and the ceiling a lot of
the unperfect and uneven elements nearly disappeared.
  
We went with a brown/taupe color palette.  
We won't know the gender for another month or so,
but we decided to just get started on the painting early 
and go fairly gender neutral. I think either baby 
blue or pink will look great with brown!

Here's the room after the painting:


Of course we did reveal more ugly flooring after
we ripped out the closet (as noted in a previous post).
We didn't make the flooring look any better with
the mud we spilled all over.  :)


Fortunately we made sure to do all the demo/reno 
work before the was carpeting installed so these kinds of 
messes wouldn't matter!  Once we got the carpet in,
the room looked so much better!


We still have to replace the floor boards
which should give the room a much cleaner look overall.
All of the accent painting/decor still needs to
be completed too, but that will have to wait until after we
learn the gender of baby nugget... and until
we clear all the bathroom stuff out of the nursery!


Hopefully we can get the bathroom reno
rolling so we can finish the nursery soon too :)

Updates to come!

Sunday, November 3, 2013

DIY - Refinishing the Clawfoot Tub, Part 2

After refinishing the exterior of the 1914 clawfoot tub
(Refinishing the Clawfoot Tub, Part 1!), it was time to tackle
the interior of the tub - the porcelain.

We thought briefly about hiring a professional.  I've read 
that's the only way to get a really great finish that will last - but I also read about several cases where professional finishes crapped out after a few months of use too...  So you can't win.  And it's hundreds of dollars, which is difficult when we're trying to get the bathroom done as frugally as possible. We have expensive taste so we have to make up for it somewhere!

First we wanted to address major flaws in the porcelain enamel.


We used a product called JB Water Weld Epoxy Putty to
patch some small scratches and larger chips, like this one:


There ended up being a lot of areas that we patched up.


After allowing the epoxy putty to cure, we sanded the entire surface of the tub to make sure it was even and ready to be refinished.  This required a combination of power sanding and sanding by hand - the curves of the tub actually made
hand-sanding with sandpaper sheets more effective than
using the power sander for a lot of areas.

We also decided that the drain needed to be removed prior to refinishing to prevent rust from forming under the old drain.  
It was incredibly difficult to get the drain out.
Theoretically they're supposed to screw out.  We tried pliers.
We got nowhere.  We tried prying it with a hammer and a flat head.  We got nowhere.  We eventually went to the hardware store and got a tub wrench similar to this.  We tried to use it (it barely fit) and we still couldn't get the drain to unscrew from the drain pipe on the underside of the tub. We tried WD-40.  Nothing.  Things were starting to seem hopeless...

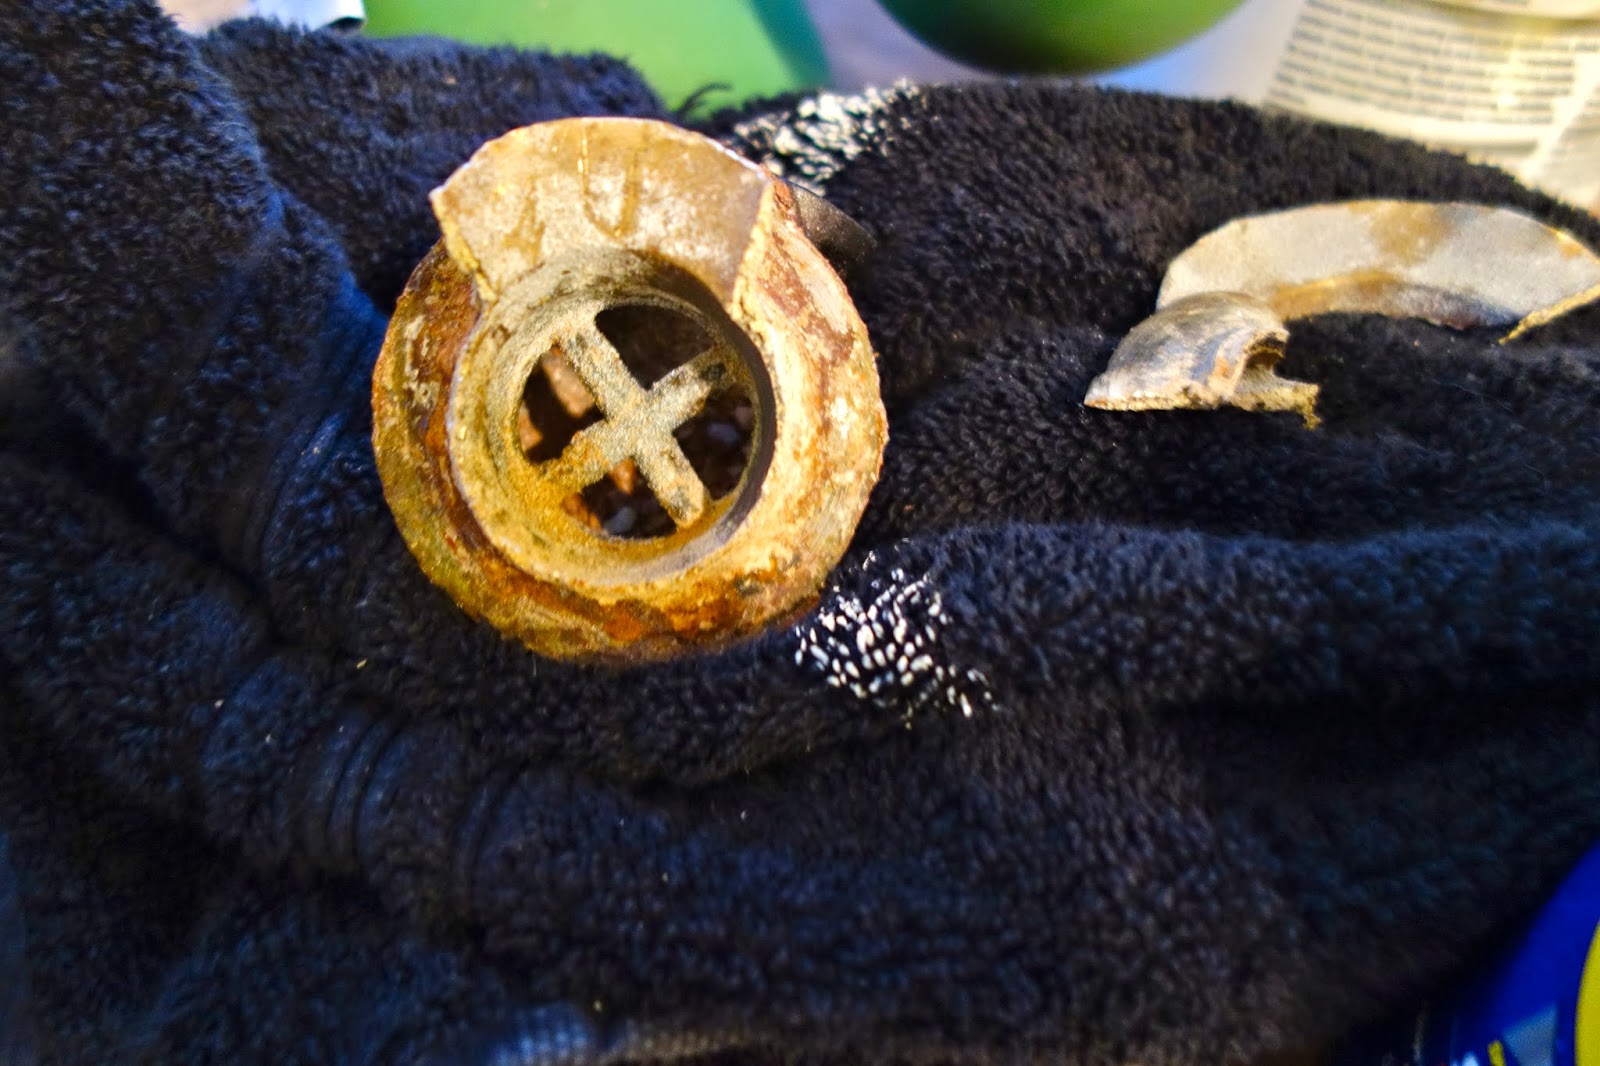
 We went back to trying to pry it up with a screwdriver and a hammer, and eventually had some success prying up the edges all around the drain.  Then one whole half of the top edge just broke off.  At this point, we went back to using the wrench which seemed even less able to fit than before (the drain had probably bent in our drain removal antics).  Clint resorted to hammering the wrench into the drain just to get it to fit.  Wouldn't you know it, Clint hammered hard enough to just push the entire drain out through the bottom of the drain hole!  Haha! YES!!


We were left with this - yummy!:


We were finally ready to start preparing the tub for the refinishing kit.  After much online research,
I chose the Bathworks Refinishing Kit w/Slip-Guard.

All in all, the refinishing process was a lot easier
than I had anticipated based on everything I had read online.
Many reviews said that it would be difficult, smelly, look crappy and peel after a few months.  (We took the risk anyways).
A majority of comments online revolved around the noxious fumes. We did the whole process outside, so that probably helped with the fumes.  I couldn't smell anything because I was using a full scale ventilator, but Clint said it wasn't bad at all.  However, if you're planning on doing this indoors, I'd definitely recommend a get up like this:


you can never be too safe!
The kit came with everything we needed.  It included an etching cleaner (which helps prep the surface for the bonding primer), sandpaper (which acts similarly), tack cloth (to wipe the tub free of all dust & debris), bonding primer, 2 part epoxy finish, non-slip additive, foam roller, foam brush, and paint tray.

Everything I read online told me that prepping the tub was the most important step -- sanding it, cleaning it, etching it and priming it.  If you failed in these steps, your finish would eventually (or quickly) begin peeling.  So we focused on that.
We followed the instructions in the kit - paying special attention to the preparatory steps, and put 2 coats of the epoxy paint finish on the tub.  I've gotta say, the tub immediately looked better!  The coating completely covered all of the stains that were on the inside of the tub.


After the two coats, we had to devise a plan to keep a bunch
of outdoorsy things (bugs/seeds/dirt/leaves) from landing on the tub and getting stuck in the finish, since it took several hours to dry. (You're also supposed to avoid putting water in the tub for 24-48 hours, which is something to note if you're doing this to your only tub/shower).  Fortunately we happened to have a loveseat cover that I never used from a previous move, 
and made that work.  Nothing landed on it!


The finish is really shiny, and feels pretty solid.
Unfortunately - it wasn't perfect. :(  Actually more like double sad face. :( :(  There were a couple runs in the epoxy, and that really annoys me because we were pretty darn vigilant about inspecting the tub while coating it (and I'm a perfectionist).
It's not terribly visible, and I don't know how many
people would notice if I didn't point it out, but:

I pumped up the definition to make the run more visible.
In retrospect, we should have gone back to check on the tub 20 or 30 minutes after we 'finished' to make sure there still weren't any runs.  That probably would have ensured something
closer to a 'perfect' finish.

Nonetheless, overall I'm happy with the Bathworks product and happy with our decision to refinish the tub ourselves.  Even as a perfectionist, I can honestly say that the tub looks pretty great, and it was a heck of a lot cheaper than hiring a company to do it.  And it was exciting that it was one more thing we did outselves.  Nothing like a personal touch!

With any luck, we did a good job doing the prep work on the tub and the finish will stay strong for many years to come (I'll update you guys in a year or so!).  And eventually, when the finish does start to falter, we'll do the whole thing again - and  next time we'll eradicate those pesky runs.  :)

Stay tuned for a short post on fixing up the tub feet!

Friday, November 1, 2013

DIY - Refinishing the Clawfoot Tub, Part 1

One of our biggest goals for updating the farmhouse
was fixing up the main bathroom upstairs.  We wanted to stay 
era appropriate, so we were thinking of a clawfoot tub.  But the bathroom isn't large enough for a shower AND a tub and I've heard that clawfoot tubs are inconvenient to shower in.  Conundrum.

In the end, we decided that maintaining the farmhouse
aesthetic and the charm of this 1911 home was worth the possible
shower inconvenience.  And it would look great.
(And isn't that what's most important??)

Looking online to buy a new clawfoot tub, I saw that
they are ridiculously expensive.  Somewhere in the ballpark of 1500-3000 (or more!), after you get all the hardware you need such as the shower conversion kit.

So naturally, I started looking on craigslist and
found an AWESOME American Standard clawfoot tub from 1914!
More specifically, August 17, 1914!  How cool was that??
And it was only 125 dollars.  Score!

the interior had some rust stains

the exterior really has some rust,
and the paint was chipping off
Although it wasn't in bad shape considering the age,
it was clearly going to need to be refinished before it would
go into the bathroom.  We started with the exterior.

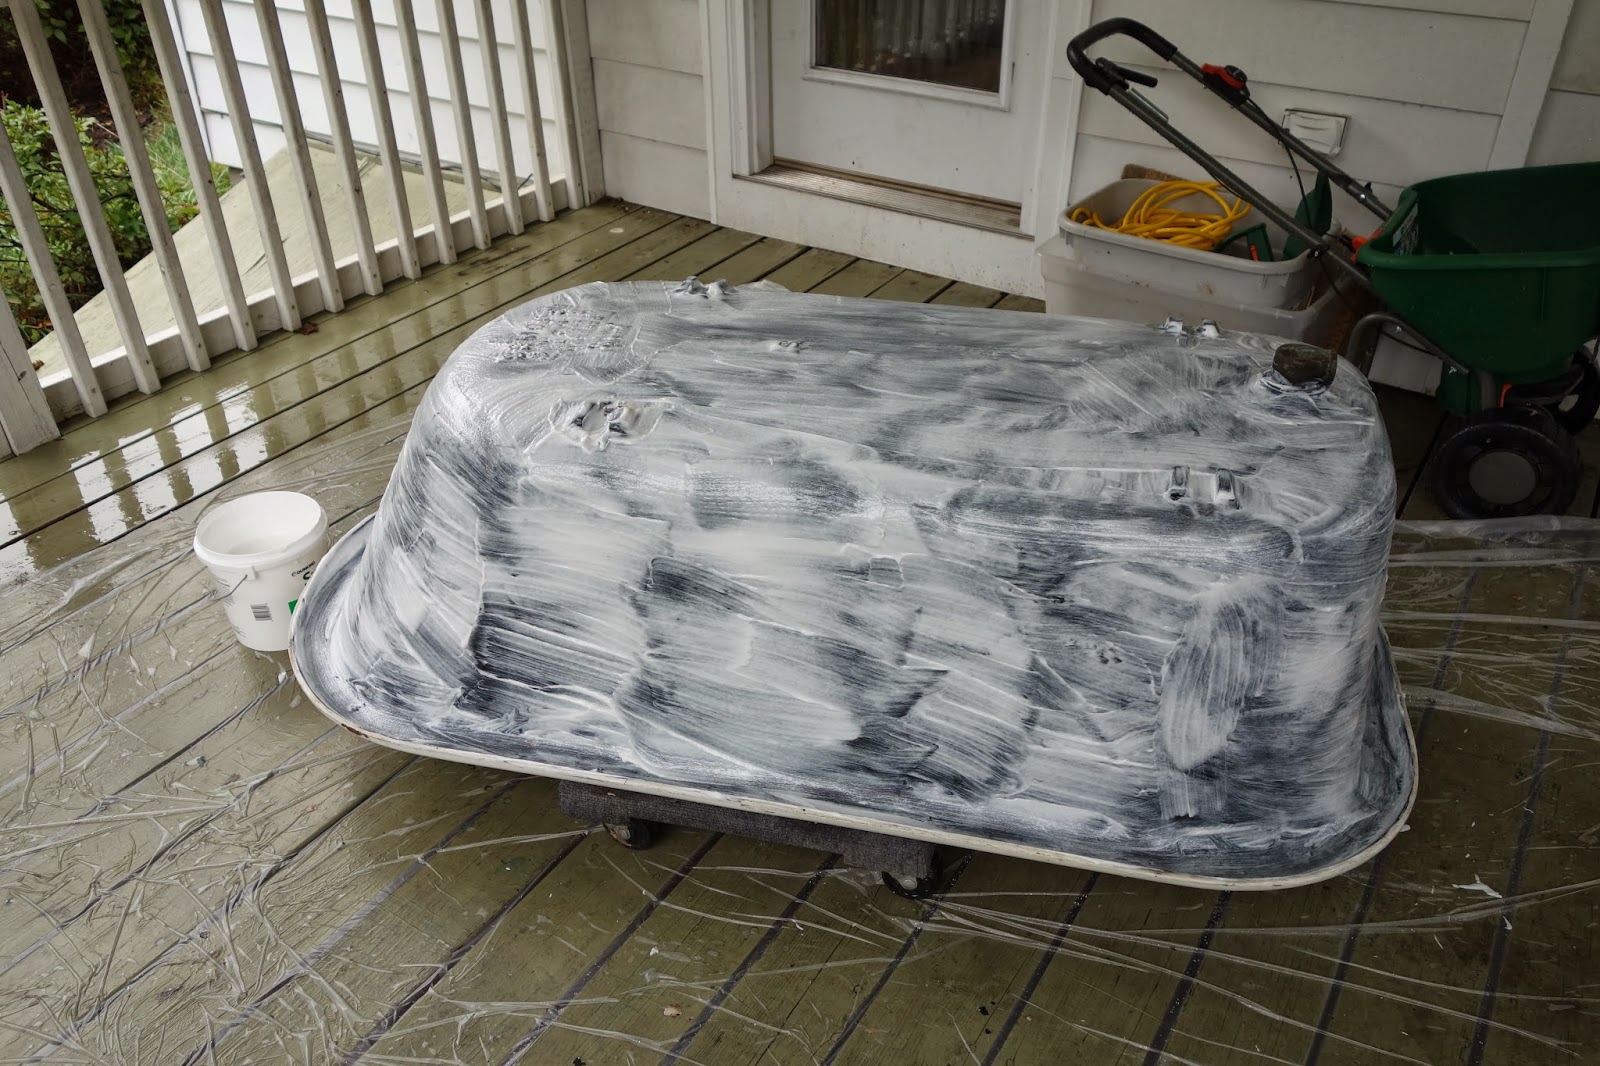
We began by stripping the paint.  After extensive online research, we got a really eco/human friendly paint stripper called 'SmartStrip'.  You paint it on, leave it for a long time, and then remove it.  After we stripped the paint off, Clint took the power-sander to the tub to smooth it out.


 It was a bit of work (have I mentioned how much I love Clint, the best husband in all the land??), but finally the tub was prepped and ready for priming!

the tub, in all of it's natural cast iron beauty
For priming, we went with the RustOleum Professional Rusty Metal Primer and I slapped 2 coats on - just to make sure we didn't miss any spots that could potentially rust out at some point. I kind of really liked the color of the primer.


The next day, it was finally time to actually paint the exterior!
We had debated if we wanted to go all white or do some color, 
and we decided that we actually really liked the black and white look and stuck with that.  It has actually inspired our renovation ideas for the whole bathroom.

We chose the RustOleum Stops Rust Hammered Spray.
Needless to say, I was really looking for rust prevention!
I really liked the way it turned out - it has a cool finish that
isn't too flat, isn't too shiny, and is perfect for covering
not perfectly flat surfaces such as cast iron clawfoot tubs.

For some reason the picture quality really sucks
on this interface.  See a better copy here.
Even though it's the bottom of the tub (and thus will
not be visible once the tub is installed in the bathroom),
Clint thought it would be cool to highlight the brand
stamp, so I used some metallic chrome spray paint
left over from painting the tub feet.


I am really happy with the way the exterior turned out,
I cannot wait to get the tub in the bathroom.
That's it for now - stay tuned for posts on refinishing the inside of the tub, and fixing up the claw-feet!